
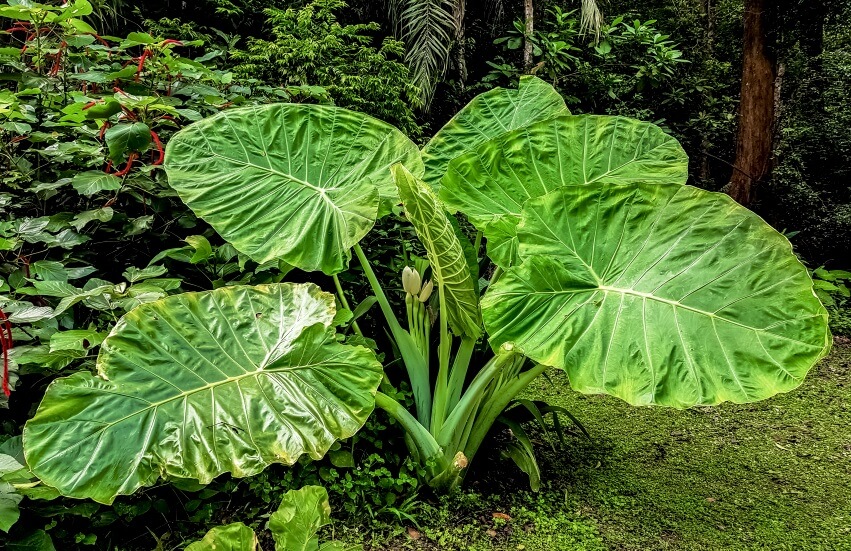
How to Propagate Elephant ear plant
Rhizomes that are buried in the ground give alocasias their growth. The plant grows larger as the rhizomes develop and produce stunning variegated leaves. The ease of propagation of Alocasias is because of this process. These Rhizomes also create tiny corms near the plant’s base that can grow into full plants with a bit of patience.
You can propagate elephant ear plants (Alocasia) through three different methods:
1) Offshoots division
2) Dividing tubers
3) Corms or bulbs
Alocasia propagation (offshoots division)
Elephant ear plants can be easily multiplied by offshoot division. Elephant ear plants spread out by sending out runners from the mother plant. After that, these runners will rise to the surface and start growing as pups or offspring of the parent plant.
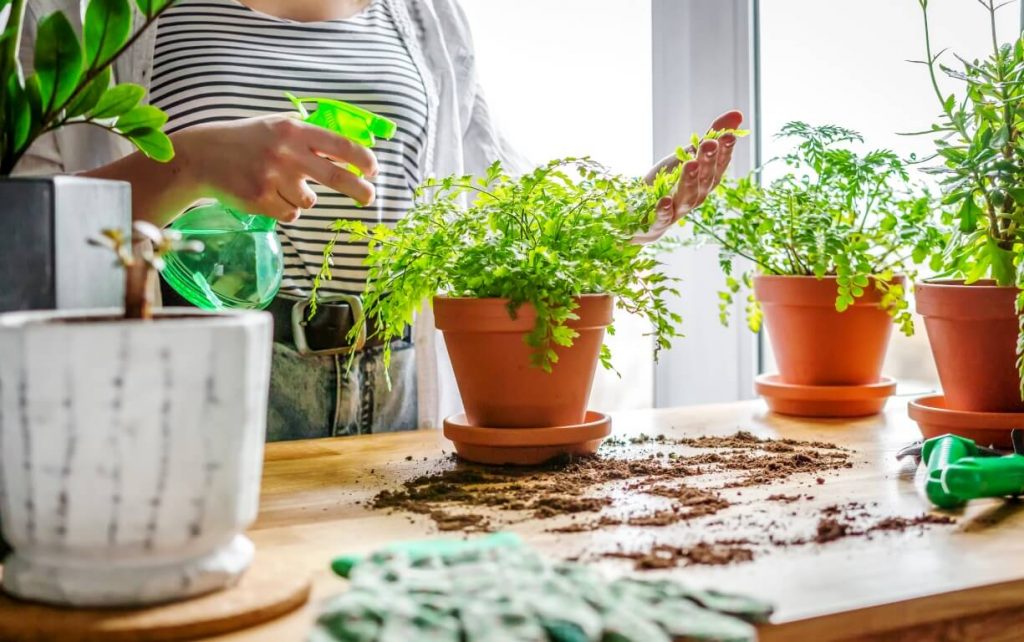
In summary, to propagate Alocasia plants, you must first cut the pup from the parent plant, checking to see whether it still has roots. Then put the pup into a new pot with a potting mix that drains well. If you keep the plants indoors, you will only need to water them once a week, but if you leave them outdoors in full light, you may need to water them every one to two days at first until they are established [1].
In order to employ this technique correctly, the following actions must be taken:
Step 1: Spot Elephant Ear pups ready for removal
As your elephant ear plant grows, it will send out runners to produce additional shoots. You can divide your elephant ear plant when one of the runners evolves into a pup and appears ready to be separated from the parent plant.
Ensure that pups have developed roots before removing them from the parent plant. You can accomplish this by removing the surrounding soil and checking their roots.
Step 2: Prepare the tools
Use gloves to protect your hands before beginning the operation since the plant sap can irritate them. To prevent the spread of illness from one plant to another, soak your instruments in the bleach you are using for tuber transfer.

Step 3: Cut apart the elephant ear pup from the parent plant
You can divide a pup from the parent plant by two different methods:
(1) To clearly see the state of the pup and determine where to cut it, de-pot the parent plant and remove all the soil from around the pup.
(2) Remove the dirt surrounding the pup so you can see where to cut it. Leave the parent plant in the pot.
Step 4: Pot the Elephant Ear Plant Pup
Place the pup in a planter or the ground outside. If you want to plant the pup in a pot, fill it with a well-draining potting mix.
If you wish to plant the pup outside, dig a large hole about one foot wide and one foot deep and fill it with new potting soil. Following that, plant the pup at the same height as it was before being separated from the parent plant.
Step 5: Water your new elephant ear pup
Once it becomes established, you only need to water your elephant ear once or twice a week if you are keeping it indoors.
If you wish to plant it outdoors, you must water it every one to two days until it becomes established. After that, you can lessen the amount of watering.
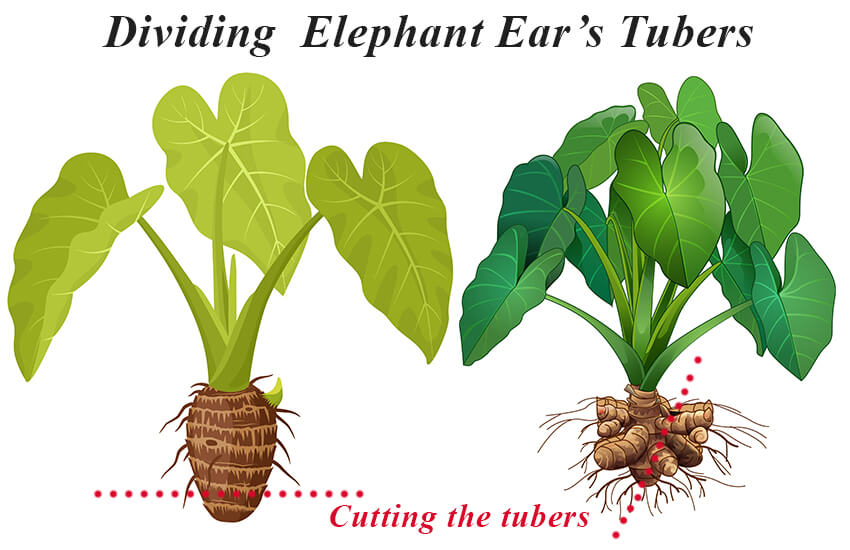
Elephant ear plant propagation (dividing tubers)
Elephant ears cannot be grown from cuttings like many other plants; however, they can be grown from tubers if the parent plant is healthy. It is recommended to divide the tubers in the fall. You can plant them in containers, or if you wish to grow this plant outside, you can put them in storage for the winter, then plant them outside in the spring [2].
In order to employ this technique correctly, the following actions must be taken:
Step 1: Take the parent plant out of the ground
For the best chance of success, dig up your parent plant in the fall. Before removing the parent plant from its pot or in-ground site, wait until the parent plant begins to become dormant in the fall and the leaves begin to die off.
In the fall, the parent plant is not actively growing; as a result, dividing the new tubers from the original growth causes the parent plant less stress.
Note: You can also dig up the tubers and divide them at the start of the plant’s growing season in the spring, though this puts additional stress on the plant. Separating the new-growth tubers from the parent plant in the spring is the best option if you want to replant them outdoors immediately.
Step 2: Select healthy tubers
In order to divide tubers from the parent plant, pick healthy ones with roots. First, gently shake the plant or use your hands to dislodge and brush off the soil to see the tubers. Afterward, check the tubers for new growth to see which ones are developing roots. The tubers should be able to survive without the parent plant as long as they have at least one new root bud or sprout.
Note: The plant may have a disease that prevents it from properly spreading. Therefore choose tubers that do not have any flaws or rotten parts.
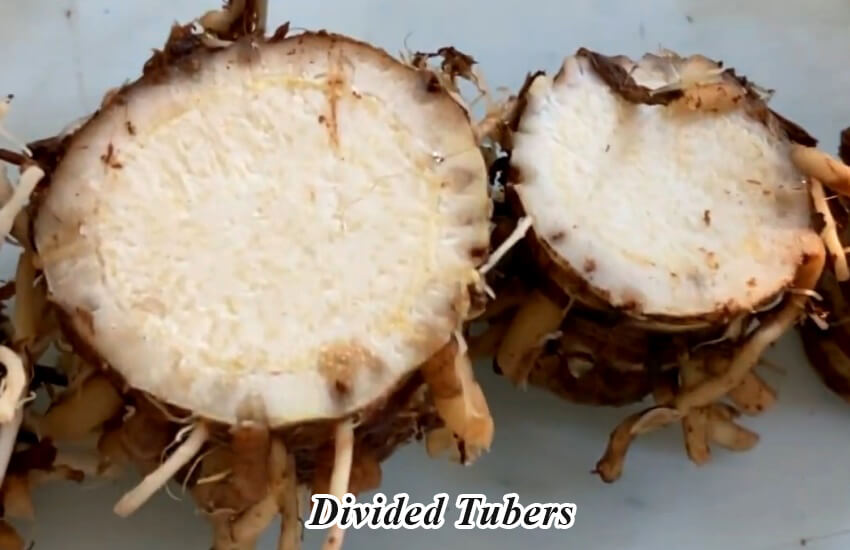
Step 3: Separate the new tubers from the parent plant
Separate the new tuber’s roots from the parent plant’s tuber by carefully untangling and cutting them. Afterward, cut them apart wherever the young tubers and parent plant tuber intersect using a sharp knife.
- Use a sterile knife to cut the long tuber from the mother plant, leaving 1/3 of the mother plant’s tuber to avoid stressing the plant.
- Cut the rhizome or tuber into little pieces about 2-3 inches long, and then apply antifungal powder to the tubers.
Step 4: Replanting the Tubers
4-1) Plant the tubers indoors:
- Plant the tubers at a depth equal to the mother plant in potting soil or a mixture of sphagnum moss and perlite.
- Plant the tubers with the pointed side facing up.
- After two to four weeks, the tuber will sprout.
4-2) Plant the tubers outdoors:
If you want to plant the tubers outside:
- Keep them in a cold, dark spot until spring.
- Keep your elephant ear tubers indoors till spring if you are in a region with chilly winters.
- Put each tuber in its own paper bag, then store the bags in a cool, dry location until the weather begins to warm up.
A basement is frequently a wise choice as long as it’s not too humid.
Note: For optimal results, keep the tubers in a room that is between 50 and 60°F (10 and 16°C). If you reside in an area with year-round temperatures above 40°F (4°C), you can replant your tubers outdoors right away.
Elephant ear propagation (corms method)
Do not give up on propagation if your plant does not have any offsets. Offsets come from corms or bulbs linked to the rhizome and grow under the soil. This means that you can propagate elephant ear plants using corms. All you need to do is to follow these steps to propagate alocasia plant from corms:
Step 1: Take the plant out of its pot
Similar to division, removing the plant from its current pot is the initial stage in propagating elephant ear plant. There may be a few corms above the earth that are simple to remove, but most of them will be found lower down, towards the rhizome. The best opportunity to multiply corms is to completely remove the soil from the area surrounding the root ball.
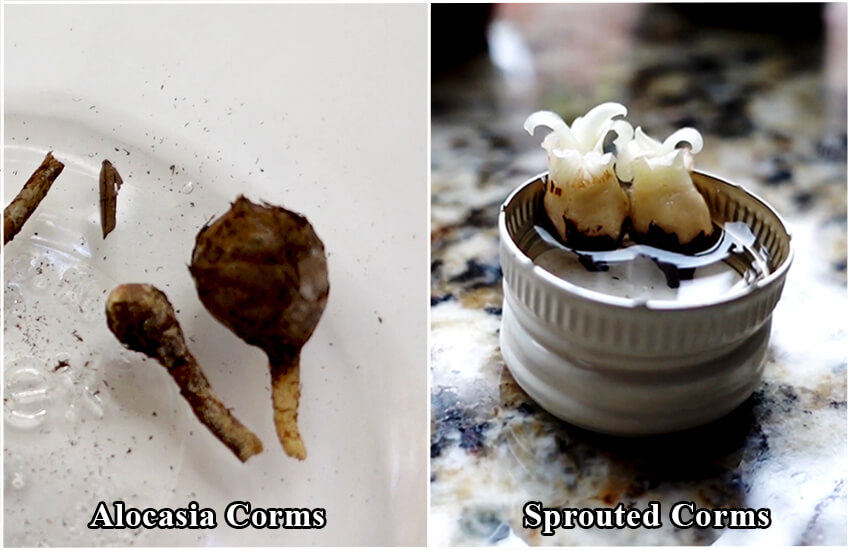
Step 2: Find the Corms
The next step is to get dirty searching for corms or bulbs. You can find these tiny, peanut-sized, spherical balls adhering to the rhizome in the soil.
If your plant is grown and healthy, you may find five or more. It is best to take as many bulbs as possible at once to increase your chances of successful propagation since some bulbs may not be viable or rot during the rooting process.
The corms ought to be simple to take off by hand. If there is some resistance, you can use a clean, sharp knife to chop them off.
Remove the outer layer of the bulbs (optional) and clean off any dirt or debris to prepare them for rooting.
Step 3: Root in Water
Use a small glass or container and add a little filtered water to it. The corm needs room to breathe and sprout, so the water line should not be higher than the top of the corm.
Put the corms in the container with the top exposed and the base submerged in water. To better understand where the leaves will emerge, you can also lay them on their sides until they are rooted. But be careful not to entirely submerge the bulb since this will cause it to rot before it can sprout.
Step 4: Cover
Covering the container with a lid or another glass increases the humidity surrounding your corms. This will create the ideal environment for sprouting. Remove the lid or glass for about an hour daily to increase airflow, then replace it again to prevent mold growth.
To keep the water line constant, constantly refill the container. The bulb’s base should always be submerged, with a few portions showing above the water. Remove the bulbs and wash the container to prevent bacterial accumulation if the water in the container begins to get persistently hazy.
Step 5: Transplant
You should observe some roots and possibly the beginnings of new leaves growing from the bulbs in a little more than four weeks. Just remove those bulbs that have not sprouted at all and concentrate on the ones that have rooted.
After sprouting, the bulb needs to be transplanted into perlite so that the plant can grow erect and neither the new roots nor the leaves decay. Perlite will keep the corms straight and in the proper place while absorbing some moisture to promote growth. You can also utilize hydroponic clay pebbles.
As the corms mature, do not leave them in perlite for too long since perlite lacks the nutrients corms require to continue growing. When the roots and leaves have both expanded, transfer the plant into a tiny container filled with soil mixture to continue growing.

I had removed my alocasia odora, with 3 healthy leaf stems, from its pot last fall. I snapped each stem off of the corm to store it. As an experiment I potted each stem, each with one leaf. It’s now nearing the end of the following growing season and I have 4 beautiful plants. New to elephant ears and didn’t think they would grow from leaf stems.